Grain Filling: The Secret to a professional Jukebox
How to separate the boys from the men.
Let’s face facts. A rich walnut or mahogany cabinet is deserving of all the care and treatment it can be given. So let’s take a beginner’s look at how you can preserve, protect and finish some of the most beautiful surfaces to ever grace a jukebox cabinet.
The topic here is grain-filling, a technique used on open-grain woods that home restorers rarely use. Why? One could surmise that most home restorers haven’t heard of the process and if they had, weren’t too sure of the steps necessary to perform it. It isn’t for everyone, but if you’re finishing or re-finishing oak, mahogany or walnut, grain-filling will be necessary. Conversely, woods such as birch, spruce, and poplar are closed grain and don’t require it.
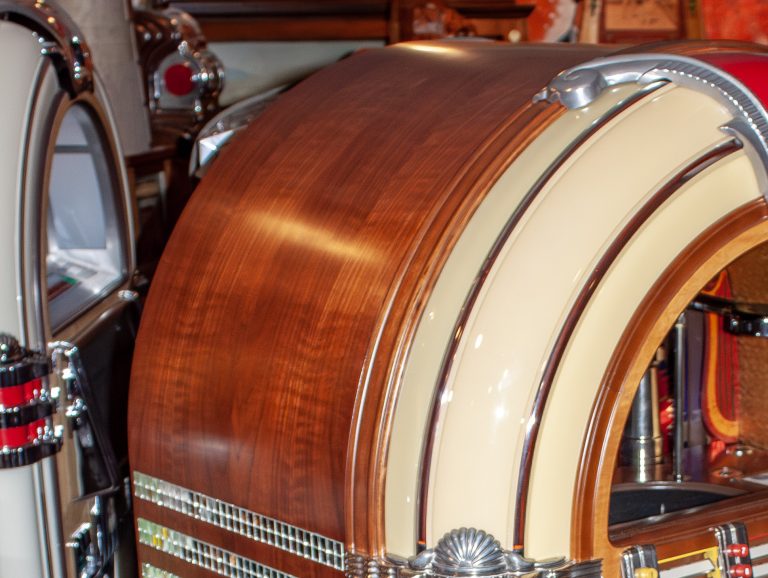
Grain-filling can make the difference between a mediocre finish and a dynamite, dressy-looking one. The result will be, to say the least, very appealing. The reason for this difference lies primarily in the way we view the wood surface. Sound quirky? Not really. If you think about it, the appearance of a machine depends on how the light bounces off all the individual parts. Chrome and backlit plastics are “naturals” for striking and breathtaking reactions, but wood … well, not always.
When light bounces off of a wood surface that hasn’t been grain-filled, the reflection of that light is disturbed by tiny indentations in the wood. This is commonly caused by the finish soaking into the individual bits of grain! How often have you inspected a wood object in average light and admired its seemingly perfect appearance only to see it again in bright, direct light (like sunlight). Suddenly that glass-like surface looks like something astronaut Neil Armstrong should be taking “one small step for man” upon! By filling that grain you will achieve a very flat, smooth and uniform surface on which to lay your topcoat.
Let’s think specifically about some of the most treasured jukeboxes. For years the debate has continued about what type of finish Wurlitzer used on its golden-age jukeboxes. Some say the finish wasn’t glossy while some believe otherwise. However, there is photographic evidence that it indeed used a very glossy grain-filled finish. If you have a copy of “Coin-Ops On Location” by Dick Bueschel, take a look at the picture on page 87. It depicts a brand-new Wurlitzer 1100 at Johnny’s Bar and Grill in Bloomingdale, N.J. Well, the location isn’t nearly as important as what the photo reveals. It was taken in 1949, which means the jukebox had to be less than a year old. A factory-fresh piece of equipment in all its original glory. Now, examine the photo further. You can literally read the sign on the wall through the reflection off the jukebox’s finish. This is clearly a grain-filled, high gloss finish.
Still not convinced? Turn to page 83 and take a look at the Wurlitzer 850 photographed in 1941. It, too, shows the same grain-filled high gloss finish.
How can you reproduce this same kind of look? There are many techniques, but one thing is absolutely certain — it can’t be done without grain fillers!
Preparation is essential so you must first properly strip, sand and stain. It’s possible to combine the staining and filling tasks in just one operation, but I recommend doing them separately. Remember the old joke about the house painter? He advertised he could paint a home in half the time because he applied both coats at once. A crazy scenario, yes, but that same silly logic could apply here. While doing both jobs in one operation will save time, the results are simply not as good.
Once stained, you can then apply a filler product with a brush or an open-weave rag. Burlap works beautifully. Move the material against the grain. This forces it into tiny grain holes. Follow the manufacturer’s directions and safety precautions at all times. So often we overlook obvious hazards and procedures when all we had to do was take a moment to read the instructions.
Use the correct color for the look you’re trying to achieve. Darker grain makes wood look more dramatic and tends to make it look older, especially oak.
One pitfall to avoid is not allowing enough time for the material to dry. If you don’t, this causes the grain to turn white because the damp solvents are trapped under the topcoat. The only way to remedy this situation is to re-strip and re-finish the surface. Ugh! Not good.
Grain-filler products are available as both water-based and solvent-based. Either type can be topcoat with solvent-based products but be careful — solvent-based products shouldn’t be covered with water-based lacquers! I prefer the old-fashioned solvent-based products because they seem easier to remove if sanding is necessary.
Keep in mind that when you’re grain-filling, you may need to apply the material twice, permitting drying time between coats. This double application usually occurs with very open-grain or new wood.
Once the grain has been successfully filled, the next step should be a sanding sealer. This just may be the most important step in achieving a perfect wood finish. It’s designed to do four things: 1) it fills the minute pores of the wood that the filler didn’t reach, 2) it blends the stain and filler colors so the shading looks uniform, 3) it creates a bond between the filled wood and the finish that you’ll apply later, 4) it seals the wood and creates a stable platform on which the topcoat will lay. Good sanding sealer sands out like sugar and with 400 or 600 sandpaper, you can prepare a silky smooth top-coat companion.
Remember that you’re actually building a foundation for your topcoat! The best finishes are not applied heavily. They’re very light. The better the foundation, the less top coat you’ll need, resulting in a much nicer finish. Here’s a simple equation to go by: Spend 85% of your time building the proper foundation with fillers and sealers; use the rest to apply your top coat.
The bottom line is to attain your preconceived restoration and repair goal. If you’re not as particular as some, quick appearance remedies are in abundance. Even a sanded slather of Bondo topped off with a coat of hammertone paint looks better than gouged and peeled wood. But if you’re looking to restore your vintage jukebox to factory-fresh luster, consider the option of grain-filling. It was, after all, preferred by the original designers.
I’d like to believe that part of the reason we restore these magnificent machines is to bestow an appreciative nod to the people who created them. By doing so we give their fine craftsmanship another opportunity to entertain and to be justly admired by hobbyists to come.